 |
| Windows 8 USB Recovery Drive |
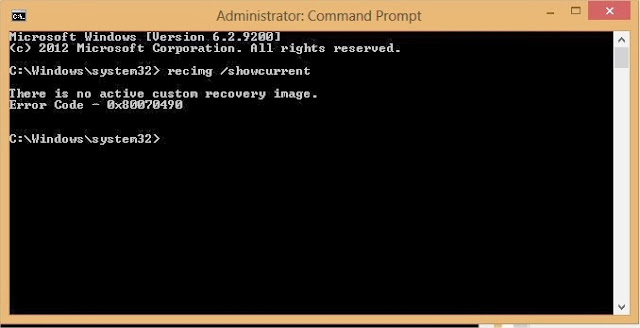
- You should check if there is already Recovery partition present on your computer, Because to create a USB recovery drive there should be a recovery image present on your computer.So to check for the recovery image on your computer.
- Open Command Prompt with Administrator rights.(Search for Command in start menu, Right click on command prompt and hit on "Run as Administrator")
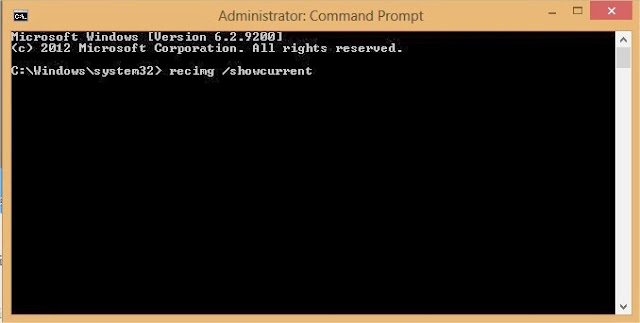
Now enter this command on your command prompt recimg /showcurrent and hit enter.As shown in below screen shot.


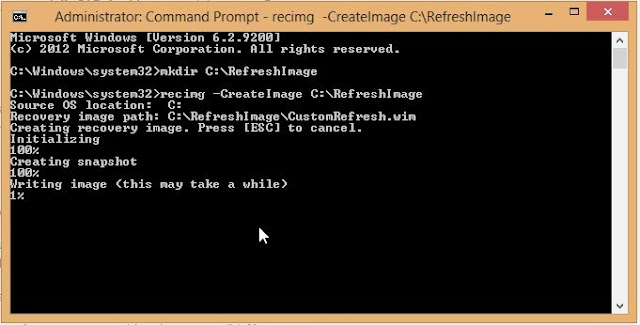
After entering these two commends you will be able to see the process of creating recovery image on your computer as shown in screenshot below.You can delete the recovery image from your computer to save the memory after completing of creating the USB Recovery drive.
- mkdir C:\RefreshImage and hit enter
- recimg -CreateImage C:\RefreshImage and hit enter

Creating Windows 8 USB Recovery Drive
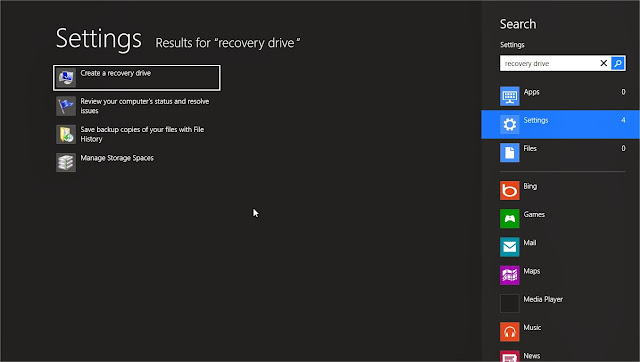
To create a recovery drive search for the "recovery drive' in windows search. and click on Create a recovery Drive. (Note you must have administrator rights, it might ask you password.)
- When the tool is opened check the box to Copy the recovery partition from the PC to the recovery drive. And hit Next
- Now Insert the USB drive into USB port, make sure that there is no information stored on your USB, as the recovery tool will completely wipe out the data stored on USB.
- And then select the usb from the list of available USB drives for storing the recovery image.And Hit next.And then Hit on Create.
- That's it! You have created Windows 8 Recovery image.You can now use that to refresh and reset your windows 8 computer.
- If you want to store the recovery image on your computer then you can hit on "Finish" or if you want to save the space you can delete the recovery image by hitting on "Delete".
- After everything is done you can remove the USB from your computer.
Source & Image : alltechtricks.com

Post a Comment